ARTICLE NO.76|A Step-by-Step Guide to Installing a Traditional Window Casement Stay
ARTICLE NO.76|A Step-by-Step Guide to Installing a Traditional Window Casement Stay
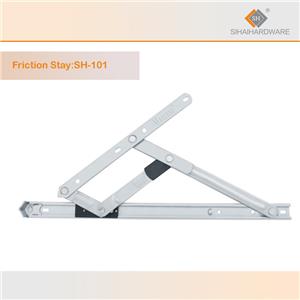
Window casement stays, also known as friction stays, play a crucial role in the smooth and controlled operation of casement windows. These essential components work in tandem with casement window hinges to provide the perfect balance of support and resistance, allowing for effortless opening and closing of the window. In this guide, we'll walk you through the process of installing a traditional window casement stay, ensuring your casement windows function at their best.
What are Window Casement Stays?
Window casement stays, or friction stays, are the mechanisms that regulate the movement and positioning of casement windows. They typically consist of two interconnected arms that allow the window to open and close with precision and stability. The friction stay mechanism creates resistance, preventing the window from swinging open too quickly or closing too forcefully.
Tools and Materials Needed:
- Window casement stay (matching the size and style of your window)
- Screwdriver set
- Drill (optional, for pre-drilling holes)
- Measuring tape
- Pencil or marker
Step 1: Measure and Mark the Placement
- Measure the width of your casement window frame to determine the appropriate size of the casement stay.
- Locate the desired position for the casement stay, typically on the side of the window frame, and mark the screw hole positions with a pencil or marker.
Step 2: Pre-Drill the Holes (Optional)
- If your window frame is made of harder materials, such as wood or metal, it's recommended to pre-drill the screw holes to prevent the frame from cracking or splitting.
- Use a drill bit slightly smaller than the diameter of the screws to create the pilot holes.
Step 3: Attach the Casement Stay
- Position the casement stay against the marked locations on the window frame.
- Secure the stay in place by driving the screws through the pre-drilled holes (or directly into the frame if pre-drilling is not necessary).
- Ensure the screws are tightened firmly, but take care not to overtighten them, as this can damage the window frame.
Step 4: Test the Casement Stay
- Open and close the window to ensure the casement stay is functioning correctly and providing the desired level of resistance and control.
- Adjust the position or tightness of the screws if needed to achieve optimal performance.
Step 5: Lubricate the Friction Mechanism
- Apply a small amount of silicone-based lubricant or window hardware lubricant to the friction mechanism of the casement stay.
- This will help maintain smooth operation and reduce wear over time.
Maintaining the Window Casement Stay:
- Regularly inspect the casement stay for any signs of wear or damage, such as loose screws, bent or damaged arms, or excessive play in the mechanism.
- Lubricate the friction mechanism annually or as needed to ensure continued smooth operation.
- Consider replacing the casement stay if it becomes too worn or damaged to function properly, as this can impact the overall performance and longevity of your casement windows.
Conclusion:
Installing a traditional window casement stayis a straightforward process that can significantly enhance the functionality and longevity of your casement windows. By following this step-by-step guide and maintaining the friction stay mechanism, you can ensure your windows operate smoothly and effortlessly for years to come. Remember to consult with a professional if you have any doubts or concerns about the installation process.